So, you want to make momos, huh? Those little dumplings are seriously tasty, and honestly, they’re not as hard to make as you might think. Forget those fancy restaurant versions for a second. We’re going to break down how to make them right in your own kitchen. It’s all about getting the dough right, making a filling that sings, and then, well, folding them up just so. Whether you’re steaming them till they’re perfect or giving them a quick pan-fry, we’ve got you covered. Let’s get cooking momo!
Key Takeaways
- Getting the dough right is the first big step. You need it to be smooth and easy to work with, not too sticky and not too tough. Resting the dough is important for this.
- There are a few ways to cook momos, but steaming is the classic. You want to make sure they cook through without getting soggy or falling apart.
- The filling and the sauce are where you can really play with flavors. From veggies to meat, and a spicy dipping sauce, these make the momos special.
Mastering The Momo Dough
Alright, let’s talk about the foundation of any good momo: the dough. Seriously, you can have the most amazing filling, but if your wrapper is tough, dry, or falls apart, the whole thing is a bust. Making your own dough might sound like a lot, but trust me, it’s way simpler than you think and totally worth it for that perfect, delicate-yet-chewy texture. We’re aiming for a wrapper that’s thin enough to be almost translucent but strong enough to hold all that delicious filling.
Basic Momo Dough Recipe
This is your starting point. It’s super basic, using just a few pantry staples. The key is getting the proportions right.
| Ingredient | Quantity (for ~40 momos) | Purpose |
|---|---|---|
| All-Purpose Flour | 2 cups (approx. 250g) | The main structure of the wrapper. |
| Salt | 1/2 teaspoon | Adds flavor and helps strengthen the dough. |
| Oil (Vegetable/Canola) | 1 tablespoon | Makes the dough more pliable and tender. |
| Water (lukewarm) | Approx. 3/4 cup | Binds everything together. |
Just mix the flour and salt, then add the oil. Gradually add the water while mixing until a shaggy dough forms. It’s not rocket science, just get it combined.
Texture and Consistency Essentials
Getting the dough’s feel just right is where the magic happens. You want it to be smooth and elastic, not sticky and not crumbly. If it’s too sticky, you’ll have a mess on your hands, and if it’s too dry, it’ll be hard to work with and might crack when you roll it out.
- Too Sticky: Add a tiny bit more flour, a tablespoon at a time, until it’s manageable.
- Too Dry/Crumbly: Add a splash more water, just a teaspoon at a time, until it comes together.
- The Goal: A dough that springs back slightly when you poke it and doesn’t stick to your fingers.
Effective Kneading Techniques
Kneading is what develops the gluten, giving your wrappers that nice chewiness and strength. Don’t skimp on this part!
- Turn the shaggy dough out onto a lightly floured surface.
- Start pushing the dough away from you with the heel of your hand, then fold it over and repeat. Keep going for about 8-10 minutes.
- You’ll know it’s ready when it’s smooth, elastic, and bounces back when you press it.
The Importance of Resting Dough
This step is non-negotiable. After kneading, the dough needs a break. This lets the gluten relax, making it super easy to roll out thinly without it fighting back.
Resting the dough allows the gluten strands to relax and become more pliable. This makes rolling out the wrappers much easier and prevents them from shrinking back or tearing.
Wrap the kneaded dough tightly in plastic wrap or place it in a sealed container. Let it rest at room temperature for at least 30 minutes, or up to an hour. You can also refrigerate it for up to 24 hours – some people even say it’s better after a cold rest, just be sure to let it come to room temp for about 30 minutes before you use it.
Rolling Out The Perfect Wrapper
This is where your patience pays off. You want wrappers that are thin but not so thin they tear.
- Divide the rested dough into small, equal portions (about the size of a large marble).
- Roll each portion into a ball, then flatten it slightly.
- Using a small rolling pin, roll the dough out into a thin circle, about 3-4 inches in diameter. Try to keep the edges thinner than the center.
- Aim for a thickness that’s almost see-through, but not quite.
Troubleshooting Dough Issues
Sometimes, things don’t go perfectly. Here are a few common problems and how to fix them:
- Dough is too tough: You probably didn’t rest it long enough, or it might be a bit dry. Try letting it rest longer, or knead in a tiny bit of water.
- Dough tears easily: It might be too dry or not kneaded enough. Add a little water and knead more, or try rolling it a bit thicker.
- Dough is sticky: Add a little more flour while kneading and rolling, but don’t go overboard. A little dusting is usually enough.
Cooking Methods For Delicious Momos
So, you’ve got your dough ready and your fillings prepped. Awesome! Now comes the part where we turn those little parcels into something truly delicious. There are a few ways to go about this, and each one gives the momos a slightly different vibe.
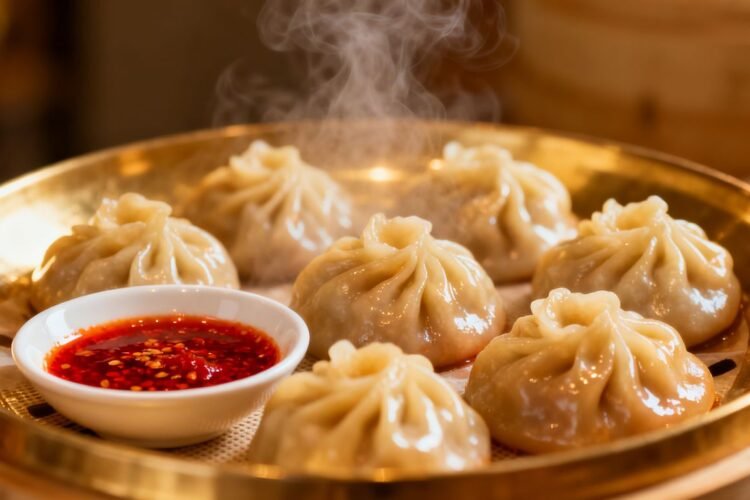
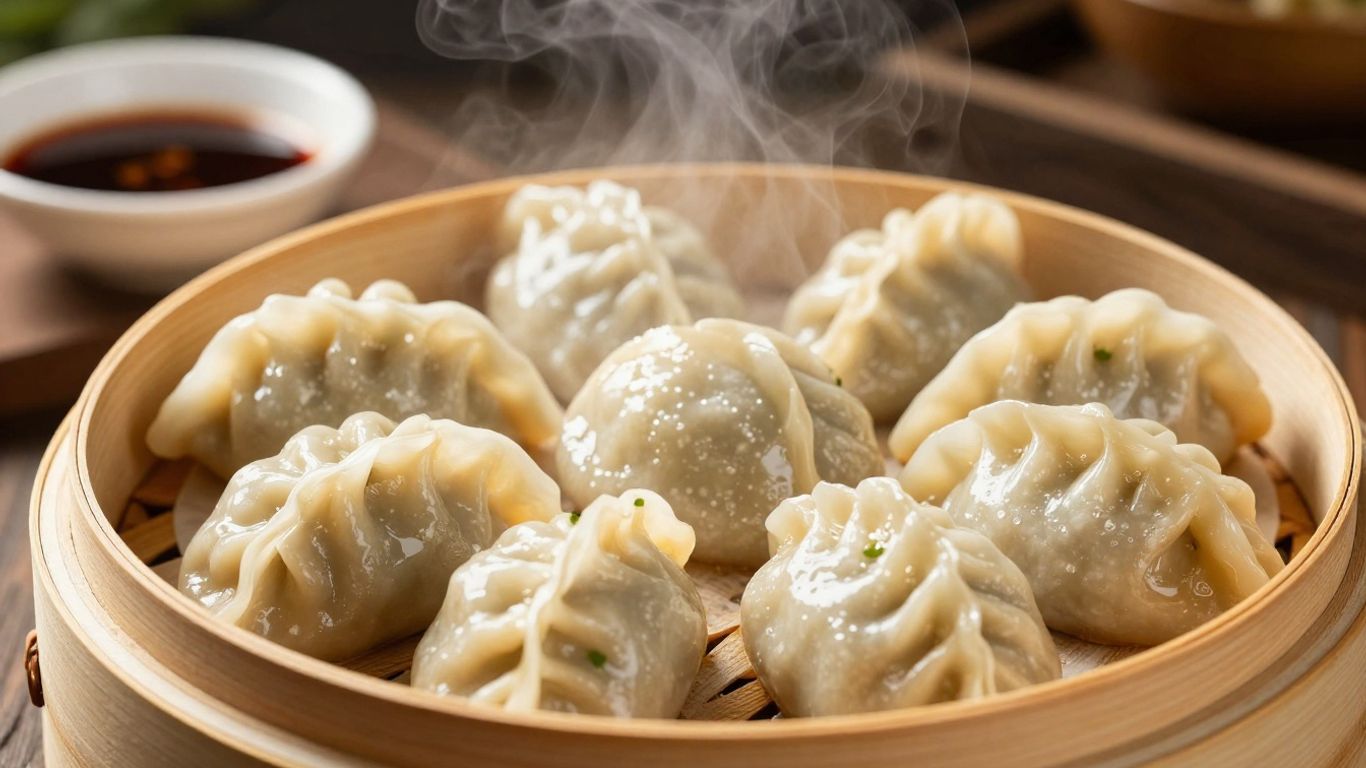
Steaming Momos To Perfection
This is the classic, the OG, the way most people think of momos. Steaming is great because it keeps everything inside super moist and tender. You don’t need fancy equipment, really. A basic steamer basket that fits over a pot of boiling water works just fine. Some people use bamboo steamers, which are pretty cool too.
- Prep your steamer: The biggest tip here is to stop them from sticking. A common trick is to line your steamer trays with fresh cabbage leaves. It works like a charm and adds a subtle sweetness.
- Arrange the momos: Don’t cram them in! Give each momo a little breathing room, maybe an inch apart. They puff up a bit when they cook, and you don’t want them to stick together.
- Steam away: Get a pot with a couple of inches of water boiling. Once it’s going, place your steamer basket on top, put the lid on, and let the steam do its thing. Fresh momos usually take about 10 to 12 minutes. You’ll know they’re done when the wrappers look a bit see-through and feel firm, not doughy.
The goal with steaming is to get that delicate, almost translucent wrapper that gives way to a juicy filling. It’s a gentle cooking method that really lets the flavors shine.
Pan-Frying Momo Techniques
If you like a bit of crunch, pan-frying is your friend. This method gives you a crispy bottom and a tender top. It’s often called ‘Kothey’ style.
- Get a pan hot: Use a non-stick pan if you have one. Add a little bit of oil – just enough to coat the bottom.
- Fry the bottoms: Place your momos in the hot pan and let them cook until the bottoms are nice and golden brown. Keep an eye on them so they don’t burn.
- Add water and steam: Once the bottoms are crispy, carefully add a splash of water to the pan (it will steam up, so be careful!). Immediately cover the pan tightly with a lid.
- Cook through: Let them steam for about 5-7 minutes, or until the wrappers are cooked and the filling is hot all the way through. The water should evaporate.
Optimal Cooking Times
Cooking times can vary a bit depending on the size of your momos and how fresh they are. Here’s a general guide:
| Method | Approximate Time | Notes |
|---|---|---|
| Steaming | 10-12 minutes | For fresh, unfrozen momos |
| Pan-Frying | 10-15 minutes | Includes frying and steaming time |
| Boiling | 8-10 minutes | Use caution to prevent sticking/bursting |
| Baking | 20-25 minutes | At 375°F (190°C) for a golden finish |
Ensuring Even Cooking
No one likes a half-cooked momo or one that’s burnt on one side. Here are a few pointers:
- Don’t overcrowd: This is key for both steaming and pan-frying. Air needs to circulate.
- Consistent heat: Make sure your heat source is steady. If you’re steaming, keep the water boiling. If you’re pan-frying, maintain a medium heat.
- Check a test momo: If you’re unsure, pull one out a minute early and cut it open. It’s better to be safe than sorry.
- Rotate if needed: For pan-frying or baking, you might need to rotate the pan or the momos themselves halfway through to get an even color and cook.
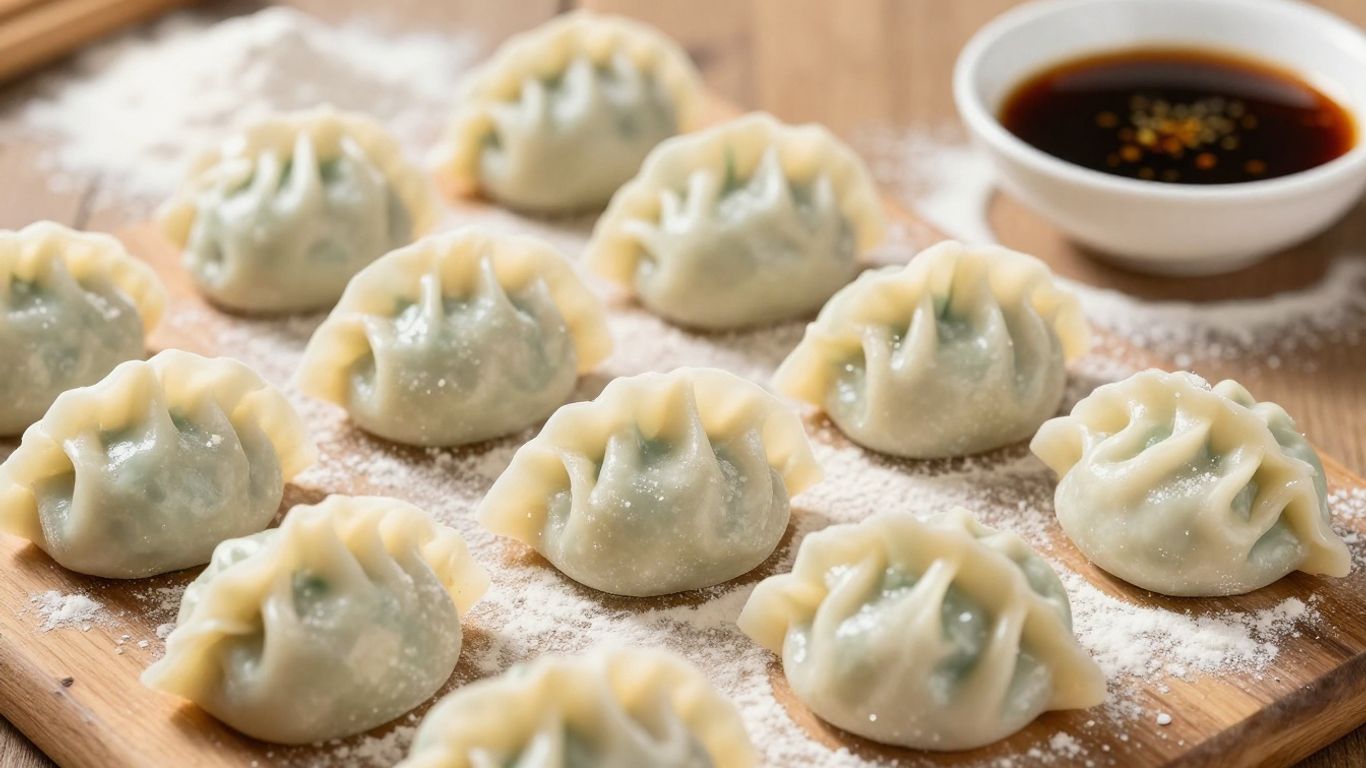
Crafting Authentic Momo Fillings And Sauces
Now that your dough is resting and getting all relaxed, it’s time to talk about what goes inside those little dumplings. The filling is really where the momo gets its personality, right? We want something that’s going to be super flavorful and, ideally, a little bit juicy when you bite into it. A dry filling is just a sad momo, in my opinion.
Authentic Nepalese Momo Recipe
For a classic Nepalese taste, you can’t go wrong with a simple yet delicious ground meat filling. Chicken or pork works great here. The key is to finely mince your aromatics and mix everything really well. You’ll want a good amount of fresh ginger and garlic, plus plenty of chopped cilantro. These three are like the holy trinity of momo flavor.
Beyond those fresh bits, a few spices really make it sing. Think cumin powder for earthiness, coriander powder for a little brightness, and a good pinch of black pepper. Some people add a tiny bit of turmeric for color, but keep it simple. The goal is to let the main ingredient shine.
The real secret to incredible momo isn’t a rare spice or a complicated technique. It’s the love and patience you pour into each step. Finding your rhythm while rolling, filling, and pleating becomes almost meditative, and I swear it makes them taste even better.
Flavorful Vegetable Momo Fillings
Don’t think veggies can’t be just as exciting! For a vegetarian option, finely chopped cabbage, carrots, and onions are a great start. Sautéing them briefly can bring out their sweetness, but many people prefer them raw for a fresher crunch. You can also add crumbled paneer or tofu for extra protein and a different texture. Again, don’t skimp on the ginger, garlic, and cilantro. A little soy sauce can add a nice umami boost here too.
Juicy Meat Momo Recipes
When it comes to meat, the fat content is your friend for juiciness. If you’re using leaner cuts, consider adding a little bit of oil or even some finely chopped onion to the mix. For chicken, ground thigh meat is usually more flavorful and moist than breast meat. Pork shoulder is also a fantastic choice. Remember to season generously and mix thoroughly. Some people even add a tiny bit of broth or water to the filling to help create that signature steamy juice inside.
Spicy Momo Sauce Recipe
No momo is complete without a dipping sauce, and a spicy one is a classic for a reason. A good base is usually tomatoes, garlic, and chilies. You can use fresh chilies for heat or dried ones rehydrated. Blend these with a bit of water, salt, and maybe a touch of cumin or Sichuan peppercorns for that tingly sensation. Some people add a splash of vinegar for tanginess. It should be vibrant and have a good kick!
Here’s a basic idea for a spicy sauce:
| Ingredient | Quantity |
|---|---|
| Ripe Tomatoes | 2 medium |
| Garlic Cloves | 3-4 |
| Red Chilies (dry) | 2-3 (or to taste) |
| Cumin Seeds | 1/2 tsp |
| Salt | To taste |
| Water | As needed |
Your Momo Journey Begins Now
So there you have it! We’ve walked through everything from getting that dough just right to folding those perfect little parcels and cooking them up. Making momos might seem like a lot at first, but honestly, it’s super rewarding. You get to create something delicious with your own hands, and the taste is just way better than anything store-bought. Don’t worry if your first batch isn’t restaurant-perfect; every attempt gets you closer. The most important thing is to have fun with it and enjoy the process. Now go ahead, gather your ingredients, and start making your own amazing momos. Your kitchen is about to smell incredible!
Frequently Asked Questions
What’s the secret to making really good momo dough?
The key to great momo dough is getting the right feel. It should be soft and easy to work with, not too sticky and not too stiff. After mixing your flour and water, you need to knead it well until it’s smooth. Letting the dough rest for a bit before you start rolling also makes it much easier to handle and get nice, thin wrappers.
How do I know when my momos are cooked perfectly?
For steamed momos, they’re usually ready in about 10 to 12 minutes. You’ll know they’re done when the wrappers look a little see-through and shiny, and they feel firm when you gently poke them. If they still look dull or feel doughy, give them another minute or two in the steamer.
Can I make momos ahead of time?
Yes, you can! You can prepare the dough and fillings a day in advance and store them in the fridge. You can also fold the momos and then freeze them on a tray until they’re solid. Once frozen, you can transfer them to a freezer bag. Cook them directly from frozen, just add a few extra minutes to the cooking time.