Looking for a tasty appetizer that’s a little bit different? This paneer tikka recipe is pretty straightforward and comes out with a nice smoky flavor, even though you’re just using your oven. It’s perfect for when you want something that feels a bit fancy but doesn’t take all day to make. We’ll walk through how to get those delicious spiced cheese cubes just right, making it a go-to for your next get-together or even just a weeknight treat.
Key Takeaways
- To make the best paneer tikka in the oven, make sure to cut the paneer into even cubes so it cooks uniformly. Marinating the paneer for at least 30 minutes helps it soak up all the yummy spices.
- You can switch things up with different vegetables like peppers or onions, or even try a Hariyali (green herb) or Achari (pickle spice) marinade for a new flavor profile.
- Leftover paneer tikka can be stored in the fridge for up to 3 days and reheated in the oven, air fryer, or skillet. Freezing is an option for longer storage, but the texture might change a bit after reheating.
Crafting The Perfect Paneer Tikka In Oven Recipe
Making paneer tikka at home, especially in the oven, is surprisingly straightforward and yields a fantastic appetizer. Forget the fancy tandoor; your oven can do a pretty good job of getting that smoky char and tender texture we all love. It’s all about getting the marinade right and letting the oven do its magic.
Essential Ingredients For Flavorful Paneer Tikka
To get that authentic taste, you’ll want to gather a few key things. The star, of course, is paneer – a firm Indian cheese that holds its shape well. For the marinade, a good thick yogurt is your base, helping to tenderize the paneer and carry all those spices. You’ll also need a blend of spices that give paneer tikka its signature flavor. Think cumin, coriander, turmeric, and a touch of cayenne for heat. Smoked paprika is a great addition to mimic that tandoori smokiness. Don’t forget fresh ginger and garlic, lemon juice for brightness, and a bit of oil or ghee to help everything coat and cook nicely.
Here’s a quick rundown of what you’ll likely need:
- Paneer: About 250-300 grams, cut into 1-inch cubes.
- Yogurt: ½ cup, thick and plain.
- Ginger-Garlic Paste: 1 tablespoon.
- Lemon Juice: 2 tablespoons.
- Spices:
- 1 teaspoon ground cumin
- 1 teaspoon ground coriander
- ½ teaspoon turmeric powder
- ½ teaspoon garam masala
- ½ teaspoon smoked paprika
- ¼ teaspoon cayenne pepper (or to taste)
- Salt to taste
- Oil or Ghee: 2 tablespoons, plus extra for brushing.
- Optional Veggies: Cubed onions, bell peppers (any color), or tomatoes.
Step-By-Step Guide To Oven-Baked Paneer Tikka
Getting this ready is pretty simple. First, you want to prepare your marinade. In a bowl, mix the yogurt, ginger-garlic paste, lemon juice, all the spices, salt, and oil or ghee. Make sure it’s all combined well.
Next, add your paneer cubes (and any veggies you’re using) to the marinade. Gently toss everything together so that each piece is coated evenly. Try not to break the paneer; it can be a bit delicate. Let this mixture sit and marinate for at least 30 minutes at room temperature, or longer in the fridge if you have time – a couple of hours is even better for deeper flavor.
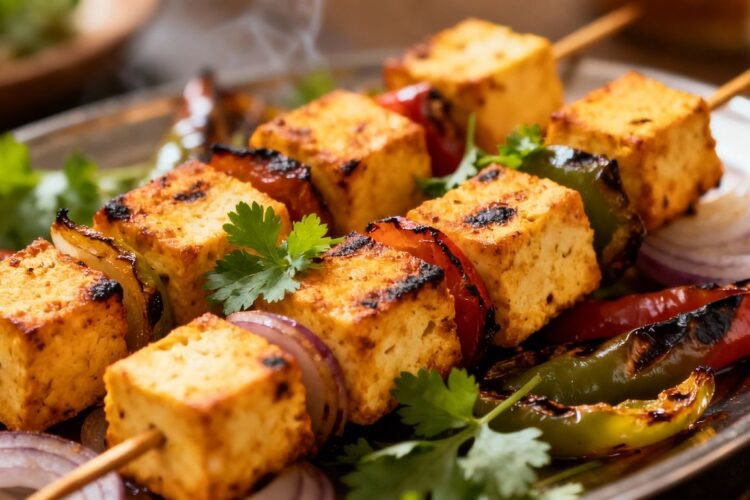
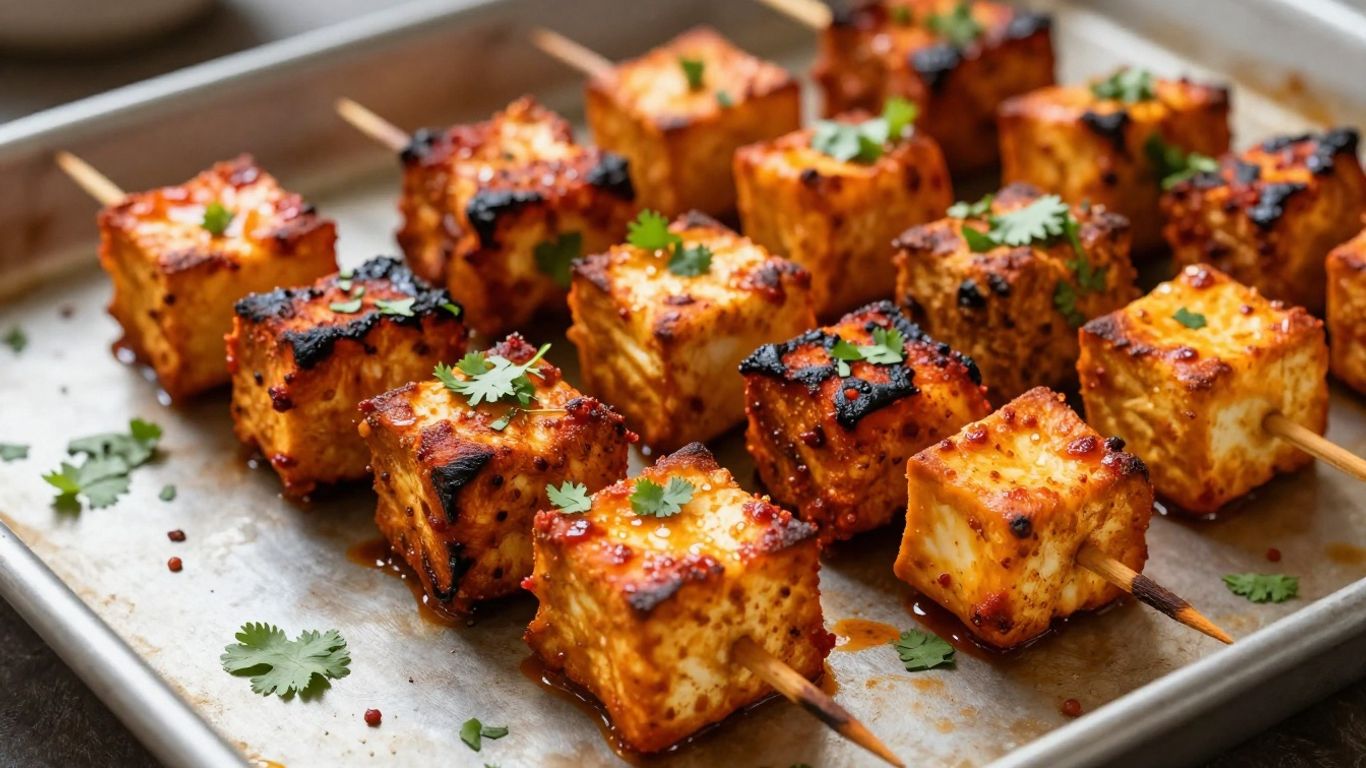
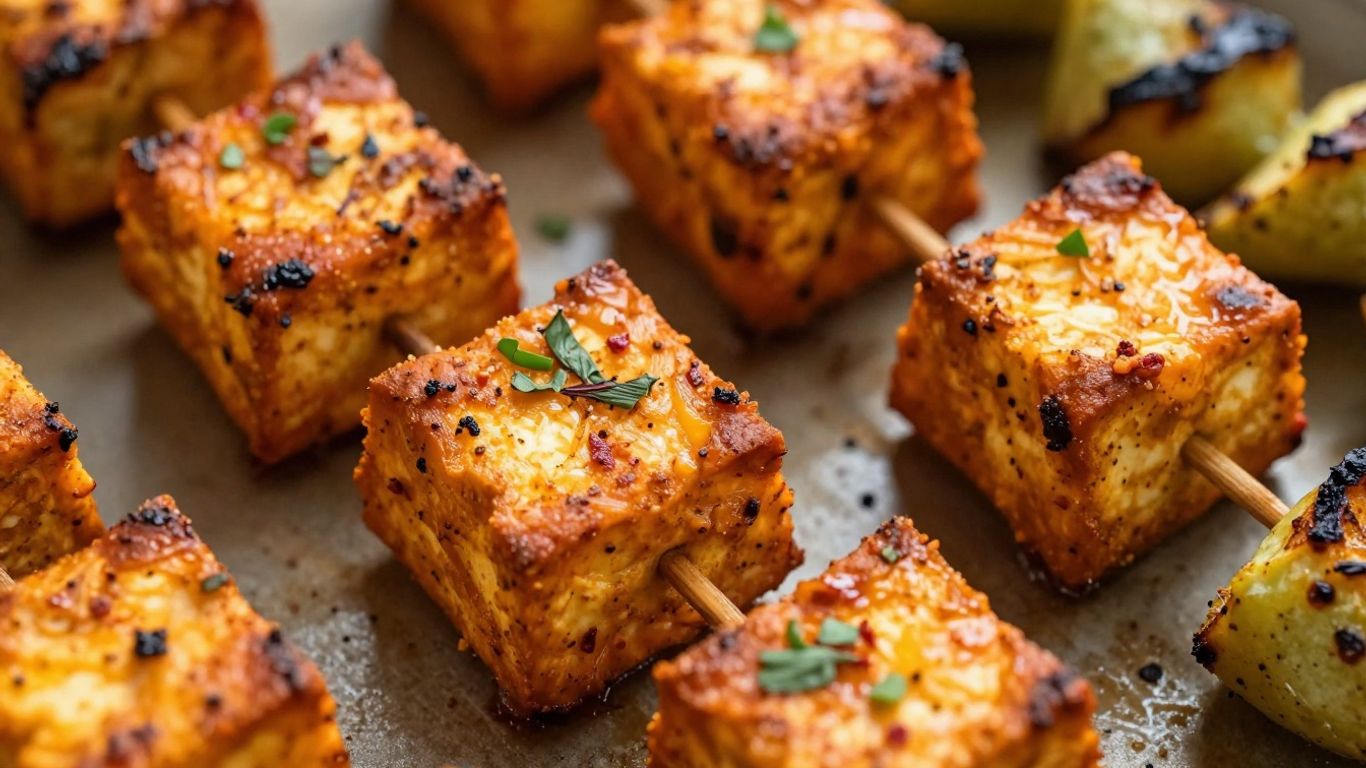
Once marinated, thread the paneer cubes (and veggies, if using) onto skewers. If you’re using wooden skewers, remember to soak them in water for about 30 minutes beforehand to prevent them from burning in the oven. Arrange the skewers on a baking sheet lined with parchment paper or foil. Brush them lightly with a little more oil or ghee.
Now, preheat your oven to 400°F (200°C). Bake the paneer tikka for about 15-20 minutes, flipping the skewers halfway through. You’re looking for those nice golden-brown, slightly charred edges. Keep an eye on it so it doesn’t burn!
A common mistake people make is overcooking the paneer, which can make it tough and dry. The goal is to warm it through and get a bit of char, not to cook it like a steak. A gentle hand during marinating and a watchful eye during baking are key.
Once they’re done, take them out of the oven. A final squeeze of fresh lemon juice right before serving really brightens up all the flavors. Serve hot as an appetizer or alongside some rice and dal for a fuller meal.
Elevating Your Paneer Tikka Experience
Creative Variations For Your Paneer Tikka
While the classic paneer tikka is fantastic on its own, don’t be afraid to play around with the flavors and ingredients. It’s a pretty forgiving dish, and you might discover a new favorite combination. Here are a few ideas to get you started:
- Hariyali Paneer Tikka: Blend fresh cilantro, mint leaves, a green chili (if you like it spicy), and a bit of ginger and garlic into a paste. Mix this vibrant green paste with yogurt and your spices before marinating the paneer. It gives the tikka a lovely fresh, herbal taste and a beautiful green hue.
- Achari Paneer Tikka: For a tangy kick, add a tablespoon of your favorite Indian pickle (achar) or some pickle masala to the marinade. This brings in those distinct, zesty flavors from mustard seeds, fenugreek, and other spices found in pickles.
- Veggie Medley: Don’t just stick to paneer! Thread chunks of colorful bell peppers (red, yellow, green), onions, tomatoes, or even cauliflower florets onto the skewers alongside the paneer. They add extra texture and flavor, and they get nicely roasted in the oven too.
Tips For Achieving Smoky Perfection
Getting that authentic smoky flavor without a tandoor is totally doable in your oven. It’s all about a few simple tricks.
- Don’t Overcrowd the Pan: Whether you’re using skewers or just placing the paneer directly on the baking sheet, give the pieces some space. This allows the heat to circulate properly, helping them get those nice charred edges instead of just steaming.
- Use a High Heat: Start with a hot oven, around 400-425°F (200-220°C). This high heat helps to quickly sear the outside of the paneer, giving it that desirable slightly crispy texture and color.
- The Smoked Paprika Trick: This is a simple but effective way to add a smoky note. Make sure you’re using smoked paprika, not regular sweet paprika. It really makes a difference in mimicking that tandoor-cooked taste.
A little tip I picked up: if you’re using wooden skewers, remember to soak them in water for at least 30 minutes before you thread your paneer and veggies. This stops them from burning to a crisp in the oven, which is always a bit disappointing when you’re looking forward to eating them.
- A Touch of Ghee: Brushing the paneer with a little ghee (clarified butter) before it goes into the oven adds a wonderful richness and helps it brown nicely. It also contributes to that slightly smoky aroma.
Enjoy Your Smoky Paneer Tikka!
So there you have it – a super simple way to get that delicious, smoky paneer tikka flavor right in your own oven. It’s honestly pretty hard to mess this one up, and the results are always so good. Whether you’re serving it up as a starter for a big meal or just want a tasty snack, this recipe totally delivers. Plus, it’s a great way to get some protein in without feeling like you’re eating something boring. Give it a try, and I bet you’ll be making it again and again.
Frequently Asked Questions
How long can I keep leftover Paneer Tikka?
You can store your yummy paneer tikka in an airtight container in the fridge for up to 3 days. Just make sure it cools down completely before you seal it up so it doesn’t get soggy from extra moisture.
Can I freeze Paneer Tikka?
Yes, you can freeze cooked paneer tikka for about 2 months. It’s best to thaw it overnight in the fridge before you reheat it to enjoy those tasty flavors again.
What if I don’t have paneer? Can I use something else?
While paneer is the star, you can sometimes swap it out for tofu if you can’t find paneer. Just remember that paneer has a unique texture and flavor that makes this dish special!