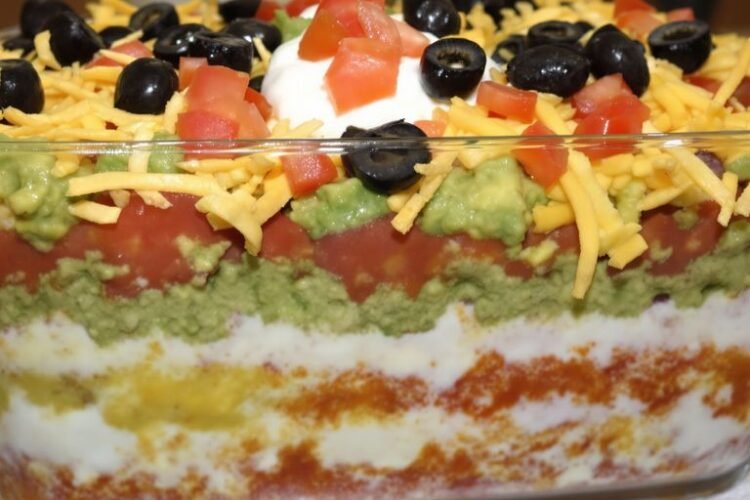
Getting ready for a get-together? You can’t go wrong with a classic 7 layer dip. It’s a crowd-pleaser that’s super easy to make and always a hit. This dip is perfect for game days, parties, or just a casual hang. It’s got all those yummy layers of flavor and texture everyone loves. Plus, it requires no cooking, which is a big win when you’re busy prepping other things. Let’s talk about what goes into this amazing appetizer.
Key Takeaways
- 7 layer dip is a fantastic, no-cook appetizer perfect for any gathering.
- This dip is versatile; you can adjust ingredients based on your preferences.
- It pairs well with sturdy tortilla chips, crackers, or even fresh veggies.
- You can assemble the dip ahead of time, making party prep easier.
- While it lasts a few days in the fridge, the layers are best when fresh.
Refried Beans
The foundation of any good 7-layer dip starts with a solid base, and that’s where refried beans come in. They provide that hearty, savory flavor that holds everything together. You can totally use canned refried beans for convenience, but if you have a little extra time, making your own can really up the ante. Just a quick tip: make sure they aren’t too watery, or your dip might get a bit soupy. A good way to check is to see if they hold their shape when you spread them.
Choosing Your Beans
- Pinto Beans: These are the classic choice and offer a smooth, creamy texture that’s perfect for the base layer.
- Black Beans: If you’re feeling adventurous, refried black beans can add a slightly different flavor profile and a darker color to your dip.
Preparing the Beans
When you’re ready to assemble, you’ll want to spread the refried beans evenly across the bottom of your serving dish. Some people like to mix a little salsa or taco seasoning into the beans before spreading them to give them an extra kick. It’s a simple step that makes a big difference in the overall taste. This first layer is key to the whole dip’s success.
Don’t be afraid to experiment with adding a bit of spice or flavor directly into the refried beans. It’s a subtle way to build complexity from the very start.
Guacamole
Guacamole is a must-have for any 7-layer dip. It adds that creamy, fresh avocado flavor that everyone loves. Making your own is pretty simple, and it tastes so much better than store-bought.
Ingredients for Guacamole
- 2 ripe avocados
- 1/4 cup finely chopped red onion
- 1-2 tablespoons fresh lime juice
- 1/4 cup chopped fresh cilantro
- 1 small jalapeño, seeded and finely minced (optional, for a little heat)
- Salt to taste
How to Make Guacamole
- Cut the avocados in half, remove the pits, and scoop the flesh into a medium bowl.
- Mash the avocado with a fork until it’s mostly smooth but still has some texture. Don’t over-mash it into a paste.
- Gently stir in the chopped red onion, lime juice, cilantro, and minced jalapeño (if using).
- Season with salt. Taste and add more lime juice or salt if needed.
The key to good guacamole is using ripe avocados and not overworking them.
Making guacamole ahead of time can be tricky because it tends to brown. To help prevent this, press plastic wrap directly onto the surface of the guacamole before covering the bowl. This minimizes air contact. You can also add a thin layer of lime juice over the top. It’s best to make it as close to serving time as possible for the freshest look and taste.
For a simple and delicious guacamole recipe, check out this family favorite.
Sour Cream
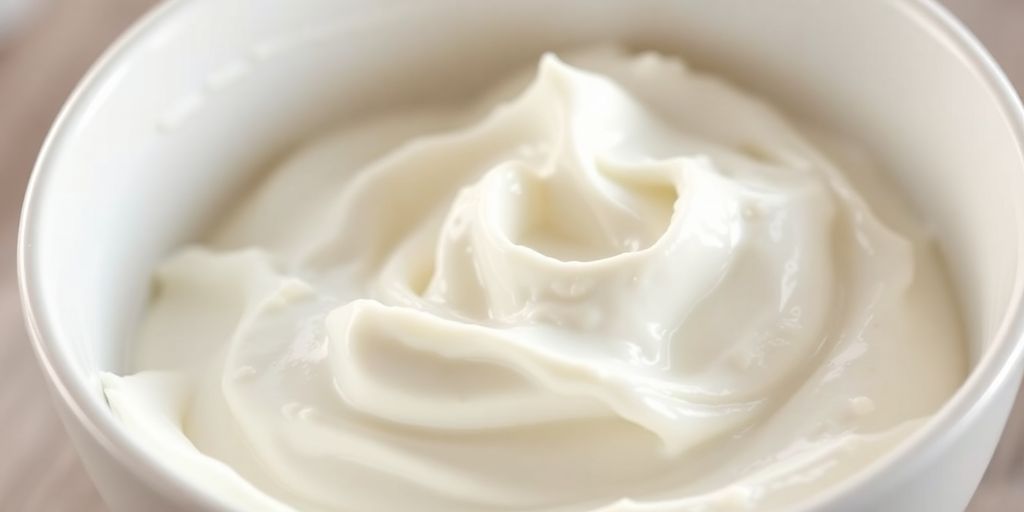
The sour cream layer is where things really start to get creamy and rich. It acts as a fantastic binder for the flavors below and provides a cool, tangy contrast to the spicier elements. You can use regular sour cream, but for an extra bit of zing, some people like to mix in a little lime juice or even a pinch of garlic powder. I usually just go with plain sour cream, though. It’s simple and works perfectly.
To make this layer extra special, I like to mix the sour cream with a packet of taco seasoning. This adds a subtle savory kick that ties everything together. It’s so easy, just dump the seasoning into the sour cream and stir until it’s all combined. This simple step makes a big difference in the overall flavor profile of the dip.
Here’s a quick breakdown of how to prepare this layer:
- Get about 16 ounces of sour cream.
- Add one packet (or about 3 tablespoons) of taco seasoning.
- Stir it all together until it’s smooth and well combined.
This mixture is spread evenly over the guacamole, creating a smooth, pale green canvas for the toppings to come. It’s important to get a nice, even layer here so the subsequent ingredients sit nicely.
If you’re looking for a slightly different take, you could also try using a mix of sour cream and cream cheese, or even Greek yogurt for a lighter option, though sour cream is the classic choice for a reason. It really is the backbone of that creamy texture we all love in a good 7-layer dip. You can find a great recipe for a classic 7-layer taco dip that highlights this layer.
Salsa
Salsa is really the glue that holds a lot of these layers together, flavor-wise. It adds that little bit of zing and moisture that makes everything meld. You can go with store-bought, which is totally fine, but if you have a few extra minutes, making your own pico de gallo or a quick salsa verde can really step things up. Just remember to drain it a bit if it’s super watery, so your dip doesn’t turn into a soupy mess. A good medium heat salsa is usually a safe bet for most people, but feel free to adjust based on your crowd’s spice tolerance. It’s a simple addition, but it makes a big difference in the overall taste of the Mexican layer dip.
Shredded Cheese
When it comes to building that perfect seven-layer dip, the cheese layer is where things really start to get interesting. It’s not just about adding bulk; it’s about flavor and texture. Most people go for a classic cheddar, and honestly, you can’t go wrong with that. A good sharp cheddar brings a nice tang that cuts through the creaminess of the layers below.
But don’t stop there! Think about mixing it up. A blend of cheddar and Monterey Jack is fantastic, offering a milder, meltier profile. Some folks even like a sprinkle of Colby or a bit of pepper jack for a subtle kick. The key is to grate your own cheese if you can. Pre-shredded stuff often has anti-caking agents that can make the layer a bit drier and less cohesive than you’d want.
Here’s a quick rundown of popular cheese choices:
- Cheddar: Sharp or mild, it’s the classic for a reason.
- Monterey Jack: Melts beautifully and has a mild flavor.
- Colby Jack: A mix of Colby and Monterey Jack, offering both color and flavor.
- Pepper Jack: For those who like a little heat.
Remember, the cheese layer acts as a bit of a binder for the toppings that come next. It helps keep everything in place, so don’t be shy with it. You want a good, even coating across the entire surface of the sour cream layer. This ensures every scoop gets a bit of that cheesy goodness.
For a truly authentic taste, consider using a Mexican blend cheese. These typically combine cheddar, Monterey Jack, and sometimes Asadero or Queso Quesadilla cheeses, giving you a complex flavor profile right out of the bag. You can find a great recipe for assembling a layered taco dip that includes this step here.
Tomatoes
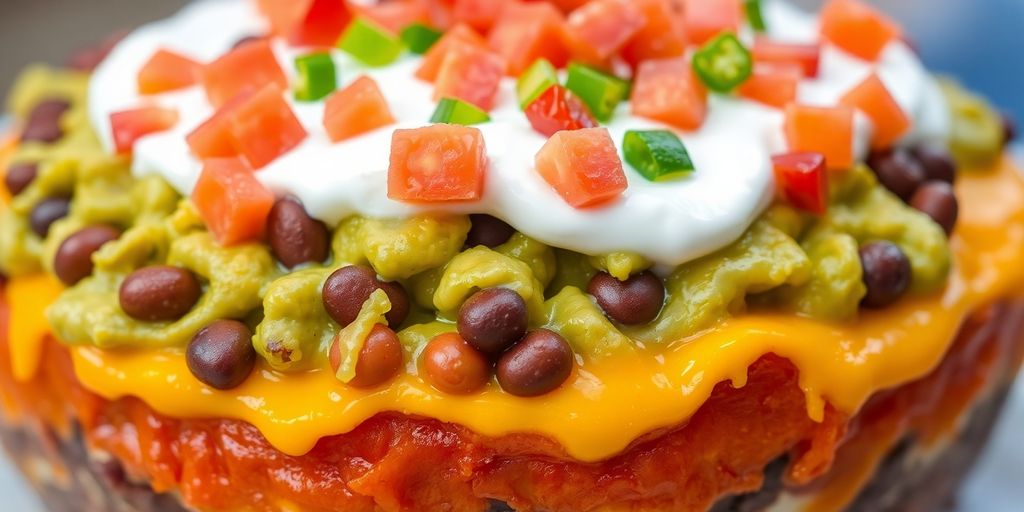
Tomatoes are a bright and juicy addition to any 7-layer dip. They add a burst of freshness and a little bit of acidity that cuts through the richness of the other layers. When choosing tomatoes, Roma tomatoes are a great option because they have less moisture and fewer seeds, which helps prevent your dip from getting watery. You can also use cherry or grape tomatoes, just make sure to dice them up small.
Draining the tomatoes well is key to a good dip. Nobody wants a soupy layer at the bottom!
Diced Tomatoes
- Preparation: Dice about 2-3 Roma tomatoes or a cup of cherry/grape tomatoes. If using canned diced tomatoes, make sure to drain them thoroughly.
- Placement: This layer goes on top of the guacamole and black beans, adding a pop of color and flavor before the final toppings.
- Tip: For an extra kick, you can even roast the tomatoes slightly before dicing them. This brings out their sweetness and adds a subtle smoky flavor. It’s a little extra step, but totally worth it if you have the time. You can find some great ideas for homemade ingredients on this recipe page.
Black Olives
Black Olives
Black olives are a classic addition to seven-layer dip, bringing a salty, briny punch that cuts through the richness of the other layers. While some folks might skip them, they’re a popular choice for a reason. They add a distinct flavor and a nice visual contrast, especially when scattered over the top. If you’re not a fan, you can always leave them off, but they do add a certain something that many people expect in this dip. They’re usually added as one of the final toppings, just before or alongside the green onions and tomatoes. You can use sliced black olives straight from the can, just make sure to drain them well so they don’t make the dip watery. Some recipes even suggest rinsing them, which can help reduce some of the saltiness if that’s a concern for you. They’re a simple ingredient, but they really do contribute to the overall flavor profile of the dip, making it a bit more complex and interesting. For a great recipe that includes homemade ingredients, check out this delicious 7-layer dip.
Tips for Using Black Olives:
- Drain Well: Always drain canned olives thoroughly to prevent excess liquid from affecting the dip’s texture.
- Rinse if Desired: If you find canned olives too salty, a quick rinse under cold water can mellow their flavor.
- Distribution: Spread them evenly over the top layer for consistent flavor in every bite.
- Optional Layer: If you’re not a fan, feel free to omit them entirely. The dip will still be delicious!
Green Onions
Green onions, also known as scallions, are a fantastic addition to any 7-layer dip. They bring a mild onion flavor and a nice bit of crunch that cuts through the richness of the other layers. You can use them as a layer themselves, or just as a garnish on top. Either way, they add a fresh pop that really makes the dip sing.
When preparing your green onions, you’ll want to chop them finely. The white and light green parts are both good to use. Make sure to wash them thoroughly before chopping to get rid of any dirt. Some people like to separate the white parts from the green parts, using the whites in one layer and the greens as a final sprinkle, but you can also just chop them all together.
Here’s a quick rundown on how they fit into the assembly:
- As a Layer: If you’re adding them as a distinct layer, spread a layer of chopped green onions over the cheese or tomato layer.
- As a Garnish: This is probably the most common way to use them. Sprinkle them generously over the very top of the dip, along with any other final toppings like olives or jalapeños.
Using green onions is a simple way to boost the visual appeal and the flavor profile of your 7-layer dip. They’re a classic ingredient for a reason!
Don’t be afraid to experiment with how you incorporate them. Some folks even like to add a few finely chopped whites into the refried bean layer for an extra kick of flavor right from the start. It’s all about what tastes good to you!
For a complete recipe and specific measurements, you can check out this 7-layer dip recipe.
Taco Seasoning
Taco seasoning is what really ties all the flavors together in a 7-layer dip, giving it that signature Tex-Mex kick. You can totally use a store-bought packet, which is super convenient, but honestly, making your own blend is pretty easy and lets you control the spice level. Plus, you probably already have most of the spices in your pantry.
A good rule of thumb is about 3 tablespoons of taco seasoning for a standard 7-layer dip recipe. This amount usually comes in one of those little packets you buy at the grocery store. If you’re making a bigger batch or just really love that taco flavor, feel free to add a little more. It’s all about what tastes good to you!
Here’s a basic mix you can try if you want to go the homemade route:
- 1 tablespoon chili powder
- 1 teaspoon cumin
- 1 teaspoon paprika
- 1/2 teaspoon garlic powder
- 1/2 teaspoon onion powder
- 1/4 teaspoon dried oregano
- 1/4 teaspoon salt
- Pinch of cayenne pepper (optional, for extra heat)
Just mix all those spices together in a small bowl. It’s a good idea to make a little extra so you have it on hand for other dishes. You can store it in an airtight container for a few weeks. This seasoning mix is perfect for adding flavor to more than just your easy 7-layer taco dip. It’s great on chicken, beef, or even roasted vegetables.
When you mix the sour cream with the taco seasoning, make sure it’s well combined. You don’t want any pockets of plain sour cream or clumps of seasoning. Stirring it until it’s smooth helps distribute the flavor evenly throughout that layer of the dip.
Jalapeños
When it comes to adding a kick to your 7-layer dip, jalapeños are your best friend. They bring that perfect amount of heat without being overwhelming, making the dip exciting for everyone. You can use them in a couple of ways to really get the flavor just right.
Finely Chopped Jalapeños
For a more integrated heat throughout the dip, finely chop one jalapeño. You’ll want to remove the seeds and membranes if you’re sensitive to spice, but leaving some in can amp up the flavor. This chopped jalapeño usually gets mixed into the guacamole layer, blending its zesty punch with the creamy avocado. It’s a subtle way to ensure every bite has a little something extra.
Sliced Jalapeños
If you prefer to control your spice level bite by bite, or just like the visual appeal, thinly sliced jalapeños are the way to go. These are typically reserved for the very top layer, acting as a garnish. This way, people can choose whether or not to include a slice of jalapeño with their scoop. It’s a nice touch for those who like to add their own heat.
Using fresh jalapeños is key here. Canned versions can sometimes be a bit too soft and lose some of that bright, crisp flavor that fresh ones offer. Plus, you get to control the exact level of heat you’re introducing to the party.
Here’s a quick breakdown of how to prep them:
- Wash: Always start by washing your jalapeños thoroughly.
- Stem Removal: Cut off the stem end.
- Seed & Membrane Removal (Optional): For less heat, slice the jalapeño in half lengthwise and use a spoon to scrape out the seeds and white membranes. This is where most of the capsaicin, the compound that makes peppers spicy, is concentrated.
- Chopping/Slicing: Depending on your preference, either finely chop the pepper or slice it thinly into rings.
Adding jalapeños is a simple step that really makes this 7-layer dip recipe stand out. It’s all about balancing those flavors and textures, and a little bit of jalapeño goes a long way in achieving that.
Enjoy Your Delicious Creation!
So there you have it – a super simple way to make a crowd-pleasing 7 layer dip. Whether you’re hosting a big game, a casual get-together, or just want a tasty snack, this dip is always a winner. It’s quick to put together, and the best part is you can totally tweak it to your liking. Don’t be afraid to swap out ingredients or add your own favorites. Now go ahead, whip up a batch, grab some chips, and get ready for everyone to ask for the recipe!
Frequently Asked Questions
Can I make this 7 layer dip ahead of time?
You can totally make this dip the day before you need it! Just put it all together, cover it up tight, and keep it in the fridge. The flavors will meld even more, which is pretty awesome.
How long does 7 layer dip last?
This dip is best enjoyed within 3 to 4 days. After that, the layers might start to mix together and get a little watery, which isn’t as fun.
Can I freeze 7 layer dip?
Nope, it’s not a good idea to freeze 7 layer dip. Things like fresh tomatoes and green onions don’t taste very good after they’ve been frozen and thawed.
Can I change the ingredients in 7 layer dip?
You can absolutely switch things up! If you’re not a fan of olives, just leave them out. You can also add other things you enjoy, like extra jalapeños for more spice or different kinds of cheese.
What should I serve with 7 layer dip?
This dip is super versatile! While tortilla chips are a classic choice, you can also dip sturdy veggies like carrots or celery into it. Even pita chips or crackers work great!
Do I need to cook any part of the 7 layer dip?
The beauty of this dip is that there’s no cooking required! All the layers are ready to go, making it a super easy and quick appetizer for any get-together.